Yes, But Is It Art?

“A house is just a place to keep your stuff while you go out and get more stuff.”
-George Carlin-


This collection of old kitchen tools has been stored in a box for many years. They once belonged to my mother and grandmother and were long past their usefulness in the kitchen, even if I could get through all the rust. Keeping things like this always presents a dilemma. There is some sentimental value here even if there is little practical value.

kitchentools1

I don’t know where I first saw the idea of hanging a frame around 3D objects,  so I can’t credit anyone. I’m grateful to that person. It’s the perfect answer for what to do with my vintage finds.

toolsontable

I laid out the tools on my table, grouping and regrouping them, until I had a pleasing arrangement. Next, I measured the groupings for length and width, so that I would know the inside dimension of the frame I would need. The nearest second-hand store had plenty of frames to choose from. I took a tape measure with me so that I could measure the opening of each frame.

I tossed the frame contents, saved the glass for another use (which is still unknown at this time), and with a little acrylic paint, I made them a set.

Now, those tools grace the wall in my kitchen. They no longer have to hide in a box and I don’t have to wonder if I should keep them at all.  I still don’t know if it’s art.

framedtools

Advertisement

No, Really? No Poo

Homemade products can be described in many ways:

Wishful thinking
Suitable or adequate
Cheaper in most circumstances
Controllable
Able to address specific problems

I can’t believe this one worked! On January 7, 2015, I washed my hair with baking soda, rinsed with diluted vinegar, and my hair felt great. I was totally amazed. My hair was squeaky clean and, after using the diluted vinegar rinse, not difficult to comb out. I wonder how much shampoo and conditioner I’ve used over the decades. It’s not something I tracked. I just always had shampoo to use, and when the bottle was empty, I bought more without question. It’s just what we do.

There are detractors online who predict dire outcomes from using baking soda, an alkaline product, on your hair. Everything from dry hair to hair loss is covered. What I found, though, is that the people writing posts like this always had a “natural” alternative to shampoo that was promoted, so no one would do the unthinkable and use baking soda. Hmmmm

I don’t disagree that baking soda is alkaline. It is. I do disagree about the damage it will cause with use. Maybe it’s long-term use that causes all that chaos but so far, I have not seen any adverse affects. I was seeing quite a bit of drying with the last shampoo I was using-the one that claimed on the label that it would do just the opposite of that. Even with a conditioner, the ends of my hair were starting to resemble straw.

Use caution. Baking soda can be harsh. After a stab at making deodorant, I found I am a bit sensitive to baking soda. My underarms were red and itchy after using the DIY deodorant. Once I stopped, all problems cleared up quickly. I haven’t done it yet, but I intend to try homemade deodorant again using less or no baking soda. Stay tuned.

The same sensitivity occurred on my scalp. After washing my hair with baking soda, I had a bit of itchiness. So, what did I do? I made sure to get some of the diluted vinegar on my scalp as well as my hair. Problem solved. No more itch.

nopoo

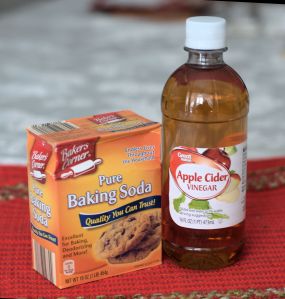
There are, of course, many posts online singing baking soda’s praises as a shampoo. The mixes range from a mild solution to those that call for making a paste of the baking soda with just a bit of water. The first one I found used 1 tablespoon of baking soda in 1 cup of water. This works for my hair. The cost of this is so small, that I really didn’t bother to figure it out.

The vinegar rinse is much the same. I use 1 tablespoon of vinegar to 1 cup of water. After you rinse your hair, no vinegar smell will remain.

The bottom line on this is that you may have to experiment with your own hair to see what works. It may not work for you and, like some DIY products, this method may only be wishful thinking.

The Dreaded Dusting Chore

Do you ever wonder what’s in dust? Do you care? I looked it up and common, household dust contains more than just dirt. I really don’t want to know any more details about the  dander, fibers and meteorite particles covering my furniture.

Tools have been conceived for the express purpose of moving dust around and, if we’re lucky, actually picking some of it up. I once had a feather duster. It was the perfect device to cause an accumulation on the furniture to become airborne. Swell.

My mother used dusting rags. She would spray them and dust the furniture. They were kept specifically for the purpose of dusting and were stored on the same shelf as her can of dusting spray. Periodically, she washed them and put them back on the shelf. I did that, too until I discovered dusters. Once I crossed over to dusters, I couldn’t go back.

I’m not here to bash dusters. They’re great, but there are some drawbacks to their use:

  • They can’t be cleaned because they are meant to be tossed after use.
  • They cost quite a bit to replace. My last box of 10 dusters cost $7.97. That’s nearly $.80 each. If you use one duster per week, you’ll spend over $40.00 each year on dusters.

The replacement cost prompted me to search for another solution. There are some clever people online who have designed DIY dusters that work very well. I followed this tutorial with some minor adjustments that made the dusters fit my handle better. Here is a similar duster.

duster1

When I made my dusters, I used a piece of fleece that was left over from another project. This act alone helps solve two problems in my house: the need for a frugal solution for dusters and a reduction in the overwhelming amount of fabric filling my closet. (I don’t know how I managed to collect so much fabric.)  It’s just a small piece of fabric, but I view it as another step on my journey to an organized sewing room. I do realize that I may never reach that destination.

duster2

Of course, dry dusting just moves the stuff around and scatters it in the air to settle in another place, or go up your nose and into your eyes.  A damp duster picks the mess up much better than a dry one, so spraying it lightly is good. I’ve found this recipe for dusting spray on several blogs, so I don’t know who to credit for it.

DIY Dusting Spray

1 cup water
1/4 cup vinegar
2 teaspoons olive oil
10-15 drops lemon essential oil
Spray bottle

Combine the ingredients in the spray bottle. Shake well.

The oil will separate as the mixture sits, so remember to shake before each use.

Happy dusting!

Fearless Gardening

Since coming to Texas, I’ve been a complete failure at growing vegetables. Well, that’s not entirely true. I did grow a pretty good pumpkin a few years ago.

005
But, on the whole, my gardening has not been that successful.  Few things I learned by gardening in other states seem to apply here.

The result is that a fear of the vegetable garden has crept into my heart. I’m determined to face my fears and charge head-long into the turbulent soil. I’m labeling this the “Year of the Abundant Zucchini.”

I started on the Texas Ag Extension website and their invaluable Vegetable Variety Selector. This is a great resource for those of us in Texas. Outside of Texas, check the listings of Cooperative Extensions Services at the USDA. I selected varieties that were listed as doing well in my county and purchased only those seeds.

It often gets too hot too fast here in north Texas and vegetable plants suffer. I’ve started things indoors before, but this year I am doing more. These little newspaper pots are easy to make plus they are nearly free. There are instructions here and here. Pick your favorite method and fold away.

seeds1

Soil for starting seeds should be very light and doesn’t really qualify as “soil” at all. Again, there are a number of mixtures you can try but equal parts Perlite and peat moss works well. Once the time comes to plant outdoors, the whole pot can be put into the garden.

So, here are my little pots and my hopes for a fearless gardening experience this year.

seeds2

Ya Gotta Start Somewhere

Years ago I started making my own laundry detergent. I could afford to buy it but I felt I was no longer getting the most for my money. Since the phosphates were removed, laundry took more time and care than it used to.

I searched the Internet for recipes and found a couple that I tried. This one is the one that I settled on. It’s easy to do.

laundry1

DIY Laundry Soap

2 cups finely grated laundry bar
1 cup borax
1 cup washing soda

Thoroughly mix together.

laundry2

You only need about 2 tablespoons per load of this mix. Hard to believe, I know, but it works. It’s not a laundry sensation, though. Stains still need to be treated. Colors still need to be separated. Some things may need a pre-soak to come clean.

So, it’s not a miracle cure for laundry woes but this mix wins the cost war handily.

Recently, I did some cost comparisons for laundry detergent that I might buy if not for my homemade mix.

Sun Concentrated was an affordable $.07 per load. Gain comes in at $.017 for each load. Tide Original closes the door with $.18 per load.

I am sensitive to the fragrance in many products, so I buy the type without added scents which are usually liquid detergents rather than the dry.

Purex Free and Clear rang up at approximately $.08 per load. All Free and Clear inched the cost to about $.10 per load. Tide Free and Gentle tipped the scale at nearly $.21 per load.

The DIY mix above comes in at $.04 per load and doesn’t leave any scent on my clothing.

With just the two of us in the house, we only have two or three loads of wash per week’ so our savings aren’t huge. But, at 3 loads a week, the least expensive, fragrance-free detergent would cost us $.24 per week, or $12.48 per year. The DIY mix is $.12 per week or $6.24 per year.

Is that going to move us on up? Probably not, but it’s a single snowflake in our snowball.


%d bloggers like this: