Ibotta: The Answer for a Recovering Couponer

Ibotta in two words: It works!

I washed in and out of couponing over the years. Sometimes I was all in, scouring everywhere for coupons I could use. Sometimes it was more hit and miss; if I found something, I used the coupon.

Lately, I haven’t done much at all. I guess I just got over the clipping phase of my life.

Then, phone apps came. I started using a grocery list app that alerted me to sales at local stores. T was great but it alerted to sales even if I was just driving past the store. I guess I could have u-turned.

Recently, I decided to give Ibotta a try. The verdict is in: I like it.

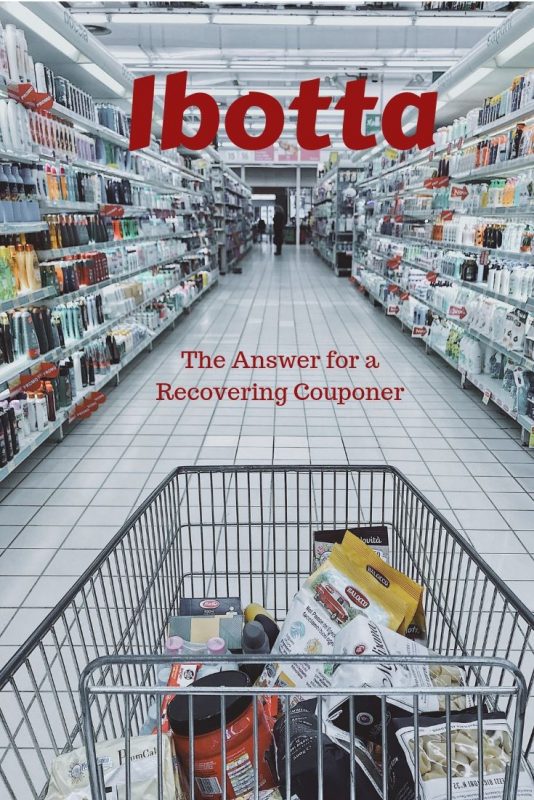
The thing I like best about Ibotta is that it focuses more on in-store purchases. Many of the other apps are all about shopping online. I’m all for shopping online but I don’t shop for groceries that way. I go to the store so that I can look at the things I buy.
It’s easy to figure out the basics: Find an offer I like, tap the “+” symbol, watch a short video or answer a simple question and the offer is in my hands. Then, I go to the store, buy the item and get credit when I scan my receipt. Easy peasy.

It’s the right mix for me. The app has discounts on things I buy and they are often for enough money to bring the price down to a competitive level. The minimal savings on most coupons didn’t save me any money. Even with doubling, the final price was often more than another brand and rarely came close to the store brand price. Recently on Ibotta, there was an offer for $1.50 off a package of lunch meat. That offer brought the price to below the store brand. Now, that’s a good deal!

On the Plus Side

Ibotta is a free app
Always has a variety of offers
Has generic offers for any brand
No points just cash
Quick approval of receipts
Can combine the offers with the store’s deals
A barcode scanner lets you know if the product is eligible for an offer

A Few of Negatives

Can only use the app-not your computer
Shopping online must be done through the app
Offers are sometimes very short-lived

DIY Stuffing Mix: Not Just for Thanksgiving

DIY Stuffing MixMy favorite part of Thanksgiving dinner is the stuffing. Maybe the pumpkin pie, too but mostly the stuffing. The meal is simply incomplete without it. I make a big batch every year and there’s always plenty of leftovers. This is one time I don’t worry about it because not a crumb will go to waste.

Bread stuffing is just too good to only have once a year. There are alternatives to homemade but packaged stuffing mixes are just short of awful, in my never humble opinion. They are loaded with salt and little else. In their defense, they are convenient.

A weeknight dinner doesn’t lend itself to lots of time-consuming cooking in most households. Even in my retirement, when time is not at such a premium, I don’t want to spend a lot of time on dinner. There are simply too many other things to do. That doesn’t mean I don’t want good food. It’s why I love this mix. It takes a couple hours to make but most of that time is waiting for the bread to dry in the oven.

I use the French or Italian bread I find on the clearance racks at the store. It’s usually half the price of a fresh loaf and perfectly good for this mix. Cubing the bread is a little tedious, but worth the effort.

This recipe comes from the book Make-A-Mix by Karine Eliason, Nevada Harward, & Madeline Westover. If you like DIY mixes, it’s worth the effort to find a copy. I have to admit that mixes fascinate me and I’ve written about them before:

Five Frugal Things I’ve Done This Month

The Baking Mix Scoop

The original recipe calls for adding dried onions to the mix. I made them optional in my version because, if I make it for stuffing a chicken or a side dish, I want to add fresh onions to it. If I use it as part of a recipe, then it’s easy to add a bit of dry onion.

Herbed Stuffing Mix


30 slices firm-textured bread, cut in 1/2 inch cubes
2/3 cup cooking oil
3 tablespoons instant minced onion (optional)
3 tablespoons dried parsley
2 teaspoons garlic salt
3/4 teaspoon ground sage
1/2 teaspoon pepper

Preheat oven to 300 degrees. Put bread cubes in two 13×9 baking dishes. Toast the bread in the oven, stirring occasionally. Remove from oven and cool slightly.
Drizzle oil over bread cubes. Add onion (if using), parsley, garlic salt, sage, and pepper. Toss to combine.
Store in an airtight container. Use within 3-4 months.

The following is straight from the Make-A-Mix book. I’m sure you would only need half of this recipe to stuff a chicken.

Supper Stuffing


3/4 cup water or broth
7 cups Herbed Stuffing Mix
6 tablespoons butter or margarine
1 onion, diced
4 large stalks celery, chopped

In a large bowl, moisten stuffing mix with liquid.
Melt butter in a medium skillet. Saute onion and celery until tender. Combine with stuffing mix and toss lightly.
Mixture can be baked in a lightly buttered casserole for 30 minutes at 350 degrees.

What mixes do you like to have in the pantry? Please leave a comment.

Panzanella Salad for Two

Panzanella Salad for Two

Panzanella Salad is a delicious mix of tomatoes, cubes of crusty bread, and a rich dressing. Does it surprise us that this salad, that has been around since the 14th century, didn’t originally include tomatoes. A previous post about a bit of tomato history is here. It just wasn’t that tomatoes weren’t available in Europe until the 16th century, they were suspect as a food source long after. The first references to this salad described it as a mix of onions and stale bread. The recipe of that time consisted of pieces of bread soaked in water and vinegar and then tossed with any fresh vegetables that were available. Onions have long storage time and were often the freshest produce around. That doesn’t really sound that appetizing but with the reputation of the tomato, who am I to judge?

In the middle ages, bread was a staple of life and a precious resource for families. Most households did not have an oven inside their residence. People had to use the communal ovens in their village to bake bread for their tables. Oven space was finite, so bread was baked only when ovens were available. Couple this with the inability to store the bread well and the loaves often became stale before the next baking day. Panzanella salad is thought to be a way that people of that time used their stale bread so that it wasn’t wasted.

The tomato remained absent from this salad until the twentieth century when availability was increased and superstition was decreased. Not only is this salad a good repository for leftover bread but any fresh vegetables in the refrigerator can be added. So in keeping with the concept of Don’t Toss It-Eat It, use any leftover bread you have on hand, such as, the last of the dinner rolls, the remainder of a loaf of bread too large for your family, or the heels that no one wants. Toast them for Panzanella instead of tossing them.

Panzanella Salad for Two

  • Servings: 2
  • Difficulty: Easy
  • Print

2 cups fresh bread cubes
1 cucumber, sliced
2 Roma tomatoes, sliced
1 Bell pepper (any color), diced
2 green onions, thinly sliced (white and green parts)
2 TBS chopped parsley
1/4 cup Italian dressing
1 TBS lemon juice
1/4 cup grated Parmesan[/recipe ingredients]

Heat oven to 350 degrees. Place bread on a baking sheet and bake until crisp. Combine vegetables in a large bowl. Mix lemon juice and dressing. Pour over vegetables and toss until coated. Add bread cubes and toss to combine. Serve immediately. Note: For an extra punch of lemon, add the zest from one lemon to the salad.

Don’t Toss It – Eat It

Don't Toss It--Eat It
Stop feeding the landfill

You are standing in front of the open door of your refrigerator when you spy a container near the back and you pull it out. Inside is a hairy, foul-smelling mess that was once food but now doesn’t resemble anything edible. We’ve all been there.

According to the Department of Agriculture (USDA), 30-40 percent of food in the United States is wasted. Astounding! Wasted food is also the single, largest component of our landfills. All of this waste costs approximately $165 billion each year. Imagine what we could do with that money.

According to the National Resources Defense Council (NRDC), a non-profit organization, the average American throws away 300 pounds of food each year which costs us about $2200. That is almost $200 per month of loss. Imagine what we could do with that money.

If food takes up 10-15 percent of our household budgets, it just doesn’t make sense to throw so much away. In the coming weeks, I’m going to offer some solutions I have used for taming the leftover monsters.

One of the ways to get started using leftovers is to notice what you always have left over. I know, obvious. In my effort to cook for two, I sometimes end up with a third serving. This usually is the result of using a whole can of something instead of a partial, which would just spoil in the refrigerator, I’m sure. One of the things I have done is to take that leftover serving to work as my lunch. Since I am now retired and I’m watching my calories, I don’t eat much for lunch anymore. So there the container sits.

To get started, here’s my recipe for Stuffed Pepper Soup. It seems I always have a little bit of rice leftover and it’s not very good reheated. It does work very well in soup. This recipe is also a good use of a green pepper that is a little wrinkled and, instead of canned tomatoes, over ripe tomatoes peeled and diced would work very well.

Stuffed Pepper Soup

  • Servings: 3-4
  • Difficulty: ”Easy”
  • Print

Ingredients


½ pound ground beef
½ cup diced onion
1 green pepper, diced
1 clove garlic, minced
1 14 ounce can beef broth
1 14 ounce can diced tomatoes, undrained
1/8 teaspoon Allspice
¾ cup cooked rice
Salt and pepper, to taste

Directions

Brown ground beef. Add onion, green pepper, and garlic. Sauté until tender. Stir in tomatoes and beef broth. Add seasonings. Simmer for 15-20 minutes until flavors have blended. If you have an Instant Pot, 5 minutes on high pressure is all you need for this soup. Add in rice. Cook another 1-2 minutes to heat and soften rice.

What’s your favorite way to use leftovers? Be sure to leave a comment.

When You Don’t Have a Maple Tree Handy…

Homemade maple-flavored syrup. Who knew? I ran across this idea in my frugal travels around the internet. It just wasn’t one of the things in my experience database. I don’t remember what we used as a child because I think that pancakes were a rare thing in our house. I do know that, when I grew up, I liked jam on pancakes better than syrup.

My local store carried maple extract in the baking aisle, so I gave it a try. It’s nowhere near the real thing. It tastes fine, easily as good as any of the maple-flavored syrups from the store. (Maybe I’m not the best judge of that, though) It is, however, quick and easy to do and there’s a bit of cost savings, too.

I used brown sugar but if you want a lighter color, use regular white sugar. Most of the recipes I found online used white sugar. One used a combination of white sugar and brown sugar and one used corn syrup as the sweetener. I think any way you do it, it will be good stuff to pour on the pancakes.

pancakes

Quick Maple-Flavored Syrup

2 cups water
4 cups brown sugar
2 teaspoons maple extract

In a non-reactive pan, bring water to a rapid boil.
Mix in brown sugar all at once. Stir until it is completely dissolved.
Remove from heat and stir in maple extract.
Pour into a sterilized jar and allow to stand, at room temperature, for 24 hours.
Store in the refrigerator for up to 6 months.

National Baked Bean Month

July is National Baked Bean Month. I have not yet celebrated this event.

I’m not a big bean fan but they do fit nicely into summer meals. Is there anything much better than something from the grill served with a side of rich beans? Well, maybe, but not during National Baked Bean Month.

Beans

The problem with cooking beans is that most recipes make far more than I need. I have tried to solve this by creating my own recipe for two. First, I cooked a large batch of beans from a recipe by a well-known author. They were awful. I don’t have a bean pot and I’m sure that was the problem with this authentic New England recipe. If I had a bean pot, they wouldn’t have tasted so bad.

After a couple more tries from various recipe sources, I still haven’t found one that I like. Is there something wrong with me or is it that you just can’t cook beans properly in Texas?

I’m not giving up, especially now that I know about National Baked Bean Month.

All Recipes boasts 70 recipes for baked beans. Maybe one of them is the recipe I’m looking for.

Frugality Requires Things

I might be retired, but that doesn’t mean that I want to spend any more time than I have to in the kitchen. Saving money isn’t rewarding if I don’t have time to enjoy it. I’ve got things to do. That’s why I use machines.

 Four of my most-used machines

Bread Machine

Does anything smell better than baking bread? OK. There might be something, but I think it’s still near the top as far as good smells. Using a bread machine simplifies making fresh bread. I’ve tried making bread the traditional way. It never turned out well and I gave up on fresh bread for many years. The bread machine solves my heavy, dense bread problem. It also solves my pizza dough and Hawaiian rolls problem.

Dehydrator

My husband likes jerky but it’s expensive to buy. Buy a dehydrator and the problem is solved. It’s incredibly easy to make jerky and at a significantly lower cost than commercially prepared jerky. I’ve dried fruit and fresh herbs with it too, but the main use in our house is jerky.

Slicer

We wait until beef is on sale before making jerky. Only one store in our area has a meat department that will slice roasts for you. That’s what we did when we wanted to make jerky. Unfortunately, this store has stopped slicing roasts that are on sale. We bought our own slicer. Now, we can buy beef anywhere it is on sale and not just at the store that would slice it for us.

Food Processor

Does it slice, dice, and julienne fry? Maybe not, but it will do a lot of great things. I use it to make mayonnaise, finely chop vegetables and nuts, and puree sauces. Again, all of these things can be accomplished by using hand tools, but I like the time-saving advantages of machines.

Kitchen tools

I can make great specialty breads for a fraction of the price. I can make a pizza with my homemade dough that rivals any restaurant pie. I can feed my husband’s jerky habit for much less. Add the time-saving benefit to the monetary savings and it’s a double whammy. It does cost money to buy machines and perhaps that isn’t always in the budget. I think we’ve saved the cost of all the machines by making jerky but something more difficult to quantify is also at work here. Life is short and time is precious.

What’s in Your Pantry?


A well-stocked pantry saves money and time. Meals can be created quickly with what’s on hand and ingredients can be mixed and matched. Out of vinegar? Try pickle brine or lemon juice instead. No canned broth? Use a can of tomatoes with the liquid. The options are endless.

This is a list of items I usually have on the shelf or in the refrigerator.

Produce

Onions-yellow, red, white, shallots, or leeks
Celery
Garlic
Carrots
Peppers-sweet and hot
Tomatoes
Lettuce-leaf, iceberg, romaine, etc
Parsley

Dairy

Cheese-Parmesan, mozzarella, cheddar, or Swiss
Milk-fresh and dried
Butter
Sour cream
Eggs

Condiments

Mayonnaise
Ketchup
Mustard-Dijon, yellow, honey
Salsa
Soy sauce
Worcestershire sauce
Hot sauce-Tabasco, sriracha or other

Sweet Additions

Dried fruit-raisins, cranberries, apricots
Honey
Jam
Sugar-white and brown
Syrup-maple or other flavor

Starches

Dried or canned beans-navy, black, pinto
Rice-white, brown, wild
Pasta-spaghetti, macaroni or other small pasta
Tortillas-flour or corn
Rolled oats

Acids

Vinegar-cider, balsamic, rice, red wine
Lemon or lime juice or fresh lemons and limes
Pickles-dill, bread and butter
Olives-black and green

Baking

Flour-all purpose, wheat, unbleached
Baking powder
Corn starch
Unsweetened cocoa
Vanilla extract

Oils

Olive
Sesame
Vegetable-corn, canola, peanut

Miscellaneous

Canned tomatoes
Tomato sauce
Tomato paste
Canned broth
Frozen vegetables
Nuts
Bread crumbs
Bacon
Peanut butter
Spices
Salt and pepper


Food: The Budget Buster

Jars of Jam


There’s no shortage of tips and advice about saving money on food.

We all know that eating out is one of the biggest budget busters around, but we still do it. I was reading one website that offered the advice: cook at home one to two times per week to save money. (Sorry, I didn’t bookmark this one.) Really? Shouldn’t it be the other way around? How much would someone save if eating out was limited to one to two times per week?

I know how busy life can get and why it’s so tempting to pick up something to go. It’s also common knowledge that cooking at home is truly the least expensive way to eat. It’s much better to save eating out for a treat instead of a regular occurrence.

Of course, there is information about what families spend on food. The US Department of Agriculture publishes a schedule of average food expenditures in America. It’s updated regularly to accommodate changes in the economy.

There are four food plans:

  • Thrifty
  • Low-cost
  • Moderate-cost
  • Liberal

I was curious about where we were in spending, so I saved grocery receipts for a few weeks, added up all expenditures for food, and then calculated a per week average. Our average spending fell in the Low-cost plan, which is approximately $109 per week. Sometimes I spent more and sometimes less, but the average came pretty close to that figure.

This was done before my husband retired from his job. While he was working, we bought some convenience foods that he took for his lunch everyday. Yes, convenience foods are expensive compared to making it at home, but eating out for lunch is much more expensive than a few packaged foods every week. Now, that we are no longer buying that type of product, our spending is probably trending downward toward the Thrifty plan. Of course, I only counted what we spent at the grocery store. We don’t eat out often enough to make much of a difference in our budget.

Knowing what you spend is important and enlightening. Haven’t we all worked with someone who bought something from the vending machine everyday or had lunch delivered to work most days? If you add up just the snacks from the machine, it could total quite a bit. A study for the vending industry found that the average cash vending machine sale is $1.16. If the purchase is cashless, then that average rises to $1.71. It is just too easy to spend small amounts of money and then forget about it. After all, it was just a dollar or two. Someone who puts five days a week in at work will spend $5.80 cash or $8.55 without cash per week . That’s $290 per year and $427.50 per year respectively. If two people from the same household hit the machines every day, we’re starting to talk about some real money.

If you have not analyzed you spending yet, give it a try. It might show that there is at least one area where you can save without it hurting. A bit of planning may save money in another area and you won’t notice that you aren’t spending as much because you’ve planned a substitute. It’s much like dieting—eat this but not that. Spend this but not that to save on food.

What’s for Dinner?

Menu

Monday:
Sweet Chicken/Bacon Wraps
Green salad

Tuesday:
Stuffed Peppers
Cucumber slices

Wednesday:
Enchiladas
Refried beans

Thursday:
Sausage and Peppers
Hard rolls

Friday:
Chef Salad

Saturday:
Oven-baked Chicken
Mixed vegetable hash

Sunday:
Salisbury Steak
Rice
Seasoned vegetables

I have found, over the years, that it’s much easier to get dinner on the table when I know what to cook each day. It was necessary when I was working. I never wanted to come home and stare at the kitchen, wondering what I could fix. With a plan, I just look at my written, weekly menu and problem solved. My list is so much a part of my routine that without one, even with a full pantry and freezer, I become the deer in the headlights when the “what’s for dinner” question comes up.

Before I go to the grocery store, I plan a week’s worth of dinners. If I want to switch them around, no problem. I did that last week. When I first planned the Chef Salad, it was for the weekend. On Friday, I didn’t feel like cooking, so I made the salad instead. The plan is top secret. No one knows what’s on it but me so changing it doesn’t cause ripples in family unity.

There’s also the opportunity to try new recipes each week and not just fall back on my tried and true meals. For me, that’s the fun part of planning. I’ll sit down with a cookbook and look over all the tantalizing recipes. OK, some aren’t that tantalizing. I skip those. I should mark the recipes in the cookbooks that I want to try, but I’m not that organized. Maybe it’s because I really do like to thumb through cookbooks.

Menu plans help you use up what you have on hand. When I’m planning, I take a quick inventory of the refrigerator and pantry. If there are things that need to be used, like produce before it goes bad, I can add that to my menu. It helps me prevent food waste which saves us some money. I can’t say that I always get to the produce before it’s spoiled. Menu planning makes me look into the refrigerator with a critical eye and I’m more likely to rescue produce on the edge of rotten.

Menu planning is one habit that’s actually good for me. Too bad I can’t say that about other things I do, but that’s for another blog post.